DLO
New Member
I thought posting this may help any of you that wanted to make fletching out of the birds you are harvesting. I always wanted to sit down and do it, but up until a few weeks ago, never did.
If you are an archer and fletch your own arrows, you know how expensive real turkey feathers can be if you want to use them on your arrows. There are imitation barred feathers you can buy but non compare to fletching made from the primary flight feathers of a wild turkey. The best thing about doing it all yourself is the feeling you get after harvesting a bird, with an arrow fitted with fletching you crafted from another bird taken with your bow. It’s a pretty cool cycle!

Tools needed:
Primary flight feathers from the wing of a turkey
Exacto-Knife or utility knife
Chopper ( in whatever profile you want )
Fletching jig
Belt sander or Rotary tool with sanding drum
400 grit sandpaper
All this really isn’t that time consuming, although it sounds like it is. The learning curve is rapid after the first fletching is completed. Here goes:
1) Make a determination of what wing you are going to use the feathers from. The fletching has to be from the same side (right or left) on any particular arrow. There is a lot of debate surrounding whether you should use left wing fletching if you are right handed. The theory being, using a left wing fletch out of a right handed bow spins the arrow away from the riser. I’ve used both (arrows fletched with left wing fletchings and arrows fletched with right wing fletchings) and have found no advantage to one or the other.
2) After your wing choice is made, remove the primary flight feathers from the wing with a scissors, cutting as close to the feather’s origin as possible.
3) Lay a harvested feather in from of you on a surface you won’t mind getting scratched. ( I use a piece of scrap oak board ) I’m right handed so I’ll describe the procedure accordingly….
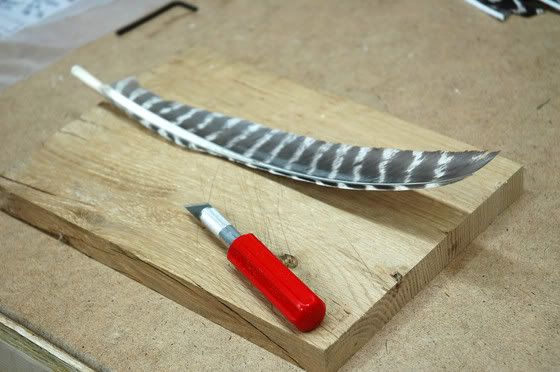
With your left hand, hold the quill so that the feather doesn’t move when making the cut. With the right hand, make a shallow cut in the quill, in the channel running down the middle, to the end of the feather.
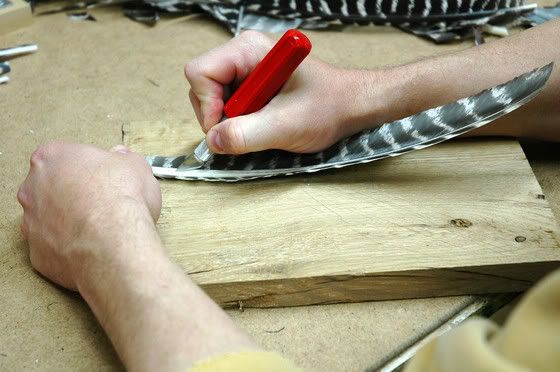
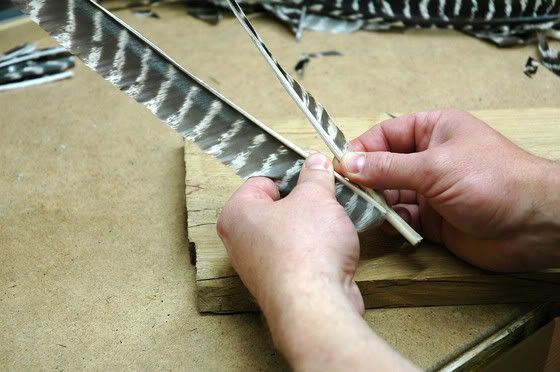
Once the pilot cut has been made, push the knife through the quill at the point were you started the cut originally. Holding the knife in a stationary position, pull the feather through the blade with your left hand. If all works the way it should, the knife blade will follow the pilot cut to the end of the feather. Discard the lower (shorter) half of the feather; the taller half is what you will use as the fletching.
4) Burning vs. Chopping: You can shape the feather into a fletching using one of two methods. Chopping involves cutting the profile into the feather before it is glued to the arrow shaft. I’m going to demonstrate this method graphically in a moment. The other method is by means of a feather burner. The profile of the fletch is created by burning the profile into the fletch after the feather is glued to the arrow shaft. Since we are discussing the chopping method, I’ll continue with it. The full length, split feather is positioned in the chopper so that the quill is square with the quill plate. I start chopping from the distal end of the feather first and work my way toward the arrow’s proximal end (where it attached to the wing) While holding the feather against the quill plate, lower the cutter onto the feather, without amputating your fingers.
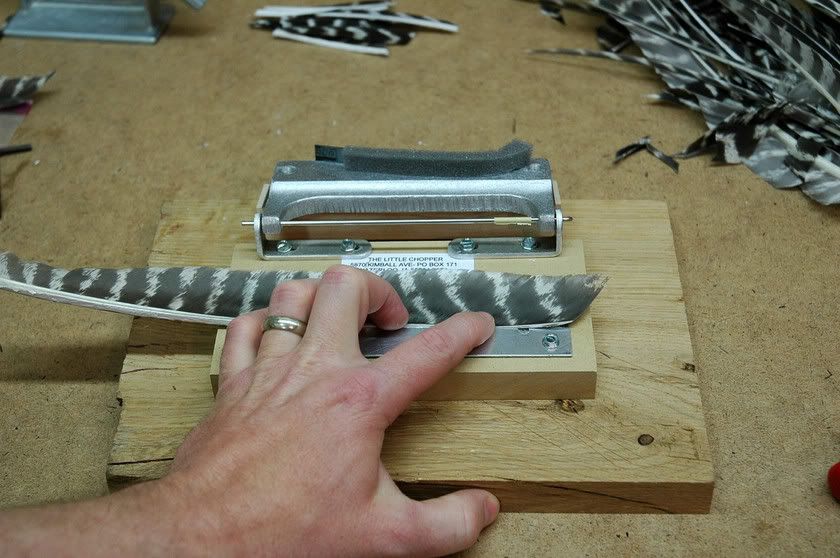
Once the blade is seated, double check that the quill is against the quill plate. Remove anything you don’t want cut off (IE: your digits) and hit the block on the top of the chopper with a small hammer.
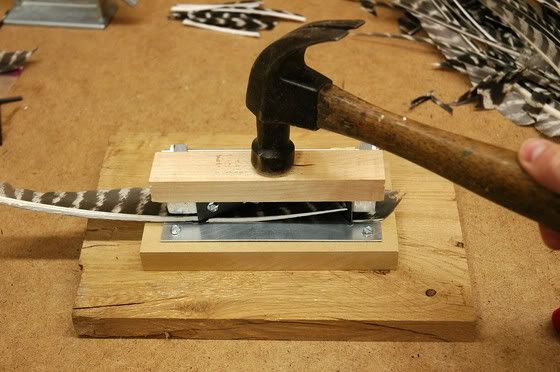
Wallah!... a fletching.
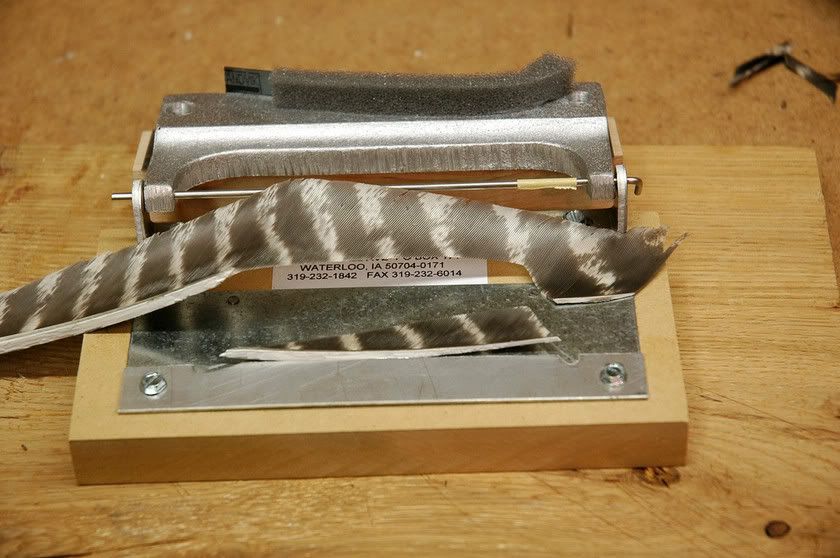
5) Sanding the quill: ( There are companies you can send your feathers to to be sanded, like True Flight for example. They do an excellent job and the feathers are returned to you looking as perfect as mass produced feathers do. Personally, I don’t send them in, I couldn’t say I did it myself if I did.) This step can be performed before the profile is cut into the fletching or after. The problem with doing it before is that you are working with a long quill, making it hard to get even along the whole length of the feather. The problem with doing it after the profile is chopped is that unless you have made a square cut when splitting the quill, the profile of the chopped fletching will be affected because the quill won’t lay square to the quill plate in the chopper. You’ll notice in the pic below, the quill is in need of thinning.
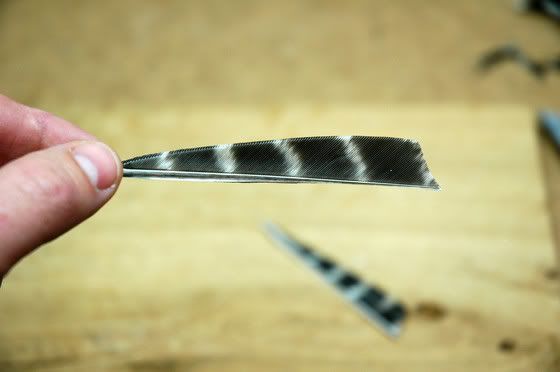
I place the fletch in the jig clamp and take the majority of material off with a Dremmel tool.
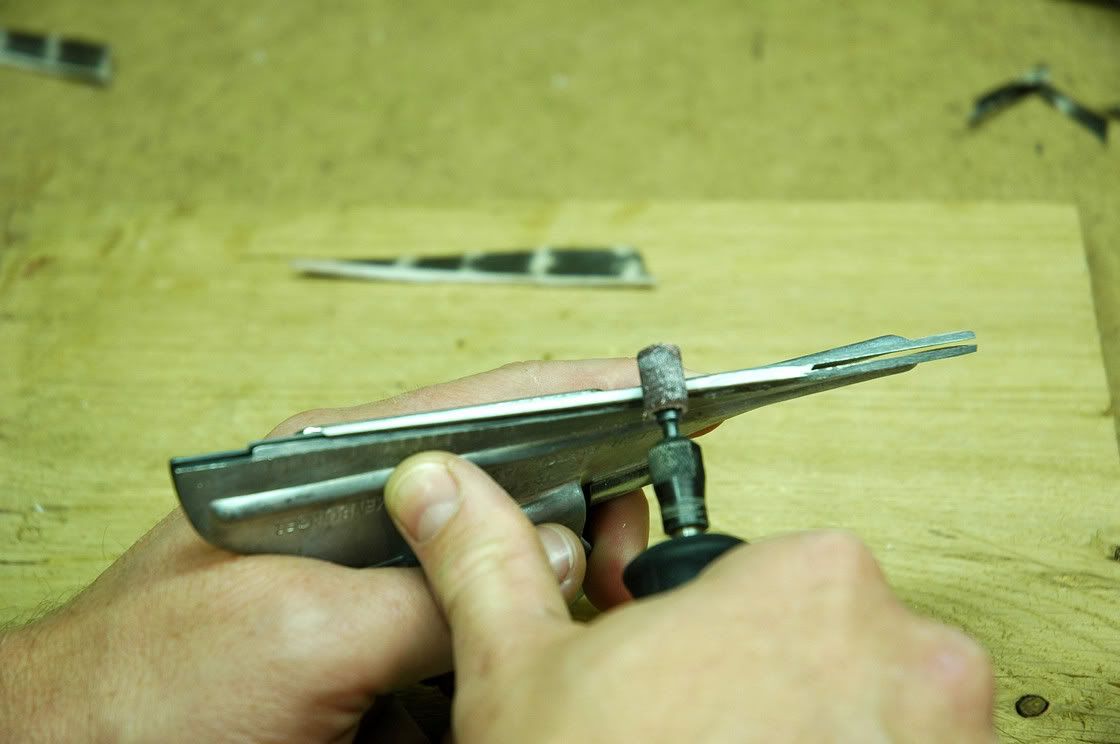
After I have it squared up, I take the rest off with 400 grit sandpaper.
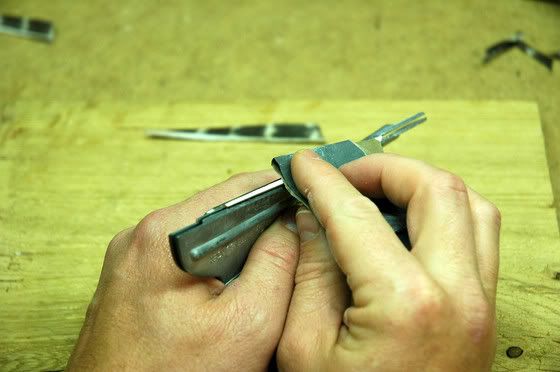
6) Glue ‘em up! After your fletchings are profiled, and sanded they are ready to glue to your arrow, I won’t get into that process….you’ll already know how to do it if you are going to attempt making your own fletching.
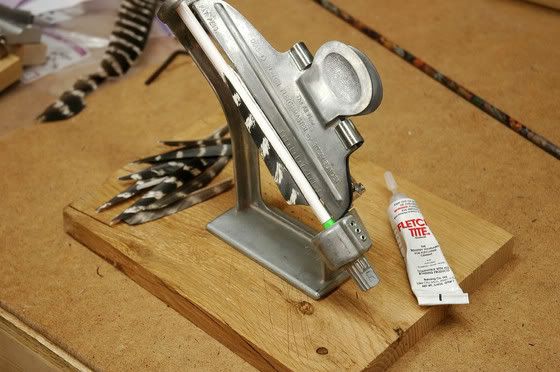
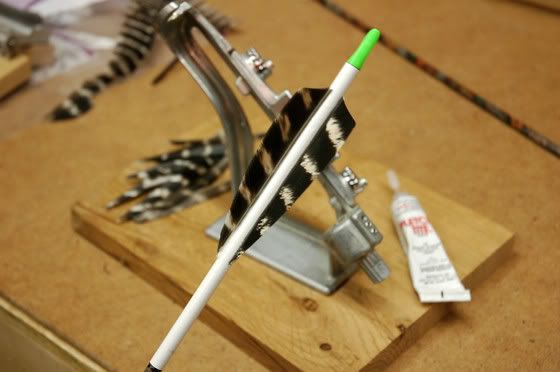
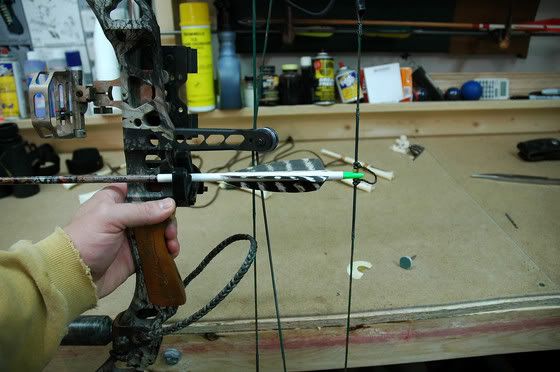
By the way, the picture of the finished arrow in my Outback was taked to give an idea what a 4 in shield cut feather looks like when nocked. It is unadvisable to shoot feathers through a biscuit rest.
Hope this helps. Have fun!
If you are an archer and fletch your own arrows, you know how expensive real turkey feathers can be if you want to use them on your arrows. There are imitation barred feathers you can buy but non compare to fletching made from the primary flight feathers of a wild turkey. The best thing about doing it all yourself is the feeling you get after harvesting a bird, with an arrow fitted with fletching you crafted from another bird taken with your bow. It’s a pretty cool cycle!

Tools needed:
Primary flight feathers from the wing of a turkey
Exacto-Knife or utility knife
Chopper ( in whatever profile you want )
Fletching jig
Belt sander or Rotary tool with sanding drum
400 grit sandpaper
All this really isn’t that time consuming, although it sounds like it is. The learning curve is rapid after the first fletching is completed. Here goes:
1) Make a determination of what wing you are going to use the feathers from. The fletching has to be from the same side (right or left) on any particular arrow. There is a lot of debate surrounding whether you should use left wing fletching if you are right handed. The theory being, using a left wing fletch out of a right handed bow spins the arrow away from the riser. I’ve used both (arrows fletched with left wing fletchings and arrows fletched with right wing fletchings) and have found no advantage to one or the other.
2) After your wing choice is made, remove the primary flight feathers from the wing with a scissors, cutting as close to the feather’s origin as possible.
3) Lay a harvested feather in from of you on a surface you won’t mind getting scratched. ( I use a piece of scrap oak board ) I’m right handed so I’ll describe the procedure accordingly….

With your left hand, hold the quill so that the feather doesn’t move when making the cut. With the right hand, make a shallow cut in the quill, in the channel running down the middle, to the end of the feather.

Once the pilot cut has been made, push the knife through the quill at the point were you started the cut originally. Holding the knife in a stationary position, pull the feather through the blade with your left hand. If all works the way it should, the knife blade will follow the pilot cut to the end of the feather. Discard the lower (shorter) half of the feather; the taller half is what you will use as the fletching.

4) Burning vs. Chopping: You can shape the feather into a fletching using one of two methods. Chopping involves cutting the profile into the feather before it is glued to the arrow shaft. I’m going to demonstrate this method graphically in a moment. The other method is by means of a feather burner. The profile of the fletch is created by burning the profile into the fletch after the feather is glued to the arrow shaft. Since we are discussing the chopping method, I’ll continue with it. The full length, split feather is positioned in the chopper so that the quill is square with the quill plate. I start chopping from the distal end of the feather first and work my way toward the arrow’s proximal end (where it attached to the wing) While holding the feather against the quill plate, lower the cutter onto the feather, without amputating your fingers.

Once the blade is seated, double check that the quill is against the quill plate. Remove anything you don’t want cut off (IE: your digits) and hit the block on the top of the chopper with a small hammer.

Wallah!... a fletching.

5) Sanding the quill: ( There are companies you can send your feathers to to be sanded, like True Flight for example. They do an excellent job and the feathers are returned to you looking as perfect as mass produced feathers do. Personally, I don’t send them in, I couldn’t say I did it myself if I did.) This step can be performed before the profile is cut into the fletching or after. The problem with doing it before is that you are working with a long quill, making it hard to get even along the whole length of the feather. The problem with doing it after the profile is chopped is that unless you have made a square cut when splitting the quill, the profile of the chopped fletching will be affected because the quill won’t lay square to the quill plate in the chopper. You’ll notice in the pic below, the quill is in need of thinning.

I place the fletch in the jig clamp and take the majority of material off with a Dremmel tool.

After I have it squared up, I take the rest off with 400 grit sandpaper.

6) Glue ‘em up! After your fletchings are profiled, and sanded they are ready to glue to your arrow, I won’t get into that process….you’ll already know how to do it if you are going to attempt making your own fletching.


By the way, the picture of the finished arrow in my Outback was taked to give an idea what a 4 in shield cut feather looks like when nocked. It is unadvisable to shoot feathers through a biscuit rest.
Hope this helps. Have fun!
